Friday, February 6, 2015

Enchilada Lasagna Verde

I'm not completely satisfied with the title, but this dish, which properly seems a combination of lasagna and enchiladas, savory layers of filled corn tortillas, creamy cashew sauce, and tangy tomatillo sauce deserves a fancy name of some sort. My desire is to mash the names together. Who has ever heard of enchilasna? Or Lasagnadas? I'm accepting submissions.

Anyway, as with so many great things, this dish came together as a sort of accident. I would normally make enchiladas and lasagna (separately, erstwhile) in a 9x13 pyrex pan. Sadly, that pan didn't make it on my recent move. (What's with pyrex, anyway? Is it impossible to clean? Or am I just hopelessly inept at doing so?) My current casserole dish is a lovely, oval-shaped white dish with a lid. I like it a lot, but it does introduce some variables into the construction of traditionally square or rectangular meals. Still, my dish is deeper than the usual 9x13 pans, which also provides some flexibility and room for innovation. And innovate I did!

I did cheat a little bit. I made the tomatillo sauce and the filling from scratch, but I had the cashew cream sauce already. I had accidentally made a double batch of the cheezy-sauce from this Cauliflower Cheese recipe, so I had that (uncooked) in a tupperware. I cooked it in a saucepan for a few minutes, just to activate the cornstarch and thicken up a bit, then added it to the enchiladas as I describe below.

If you are feeling fusiony but directionless, you could do worse than these enchilasnas. Also, if you're like me and abhor canned enchilada sauces, it's difficult to beat a homemade verde sauce.

Enchilada Lasagna Verde Casserole

Verde Sauce

1 1/2 pounds fresh tomatillos, diced
1/2  sweet onion, diced
1 jalapeno, seeded and diced finely
2 cloves garlic
2 cups vegetable broth

Enchilada Filling

1 medium butternut squash, diced
1 can black olives, sliced
2 cans black beans
1/2 onion, diced
2-3 garlic cloves
1 T chili powder

To assemble:

12-15 corn tortillas
cashew cream sauce
chopped, fresh cilantro

First, make the verde sauce. In a medium saucepan, saute onions and garlic in a little olive oil for 2-3 minutes. Add the jalapenos and cook for 1 minute. Add diced tomatillos and cook for about 2 minutes or until they start breaking down. Add vegetable broth and simmer for 10-15 minutes. If you are lucky enough to have an immersion blender, this is the time to break that out. If not, dump the the sauce into your blender or food processor and blend until it's still a bit chunky. Transfer the sauce back to the saucepan and taste for salt. Adjust seasonings as desired. (See? So easy! Why would you ever use one of those horrid pre-made sauces?)

While the sauce is cooking, preheat your oven to 375. Spread the squash, onion, and garlic on a large baking sheet. Drizzle with olive oil and salt lightly, then mix to coat. Roast for approximately 30 minutes, stirring once, or until squash is tender and looks slightly caramelized. One could, of course, do this step on the stove instead, but I like the sweetness that roasting brings out in the squash. If you are anti-roasting, adjust as necessary.

In a large bowl, combine beans and olives. Add squash mixture and stir to combine. Now, assemble your enchilasnas!

Ladle about a  cup of sauce into the bottom of your deep casserole dish. Spread it around to coat the pan evenly. Next, scoop about 1/4 cup of the filling into a tortilla and roll, then arrange, seam down, in the pan. When you have a layer of filled tortillas, cover with half the remaining sauce, then half the cheezy sauce. Repeat with the second layer.

Bake in your 375 degree oven for 40 minutes, then let it stand for 10 minutes before serving.

I don't think the picture does this dish justice, but trust me. Don't let my lack of facility with all things visual undermine the yumminess the of the enchilasna.

Saturday, January 17, 2015

Whole Wheat Waffles

I feel like I've been chasing waffles all my life. Well, not ALL my life, but certainly an unhealthy portion of my adult one. For no other reason, really, than that they have been so stupidly elusive. I loved waffles when I was a kid and my mom would make them. Every once in a while, we would have waffles for dinner. She would make a great big batch and the table would be covered with toppings--warmed-up frozen berries and strawberries, Cool Whip, and peanut butter, alongside the usual butter and syrup. As an adult, though, in spite of having gone through no fewer than... 3? 4? waffle irons, I never found one that did the trick. Some would work fairly well initially, only to prove harder and harder to clean. The waffles would release from the iron only if I was careful to apply oil between batches, and the accumulating oil gunked up the waffle maker until not only did I not want to make waffles but I didn't even want to touch the thing.

Then, just about one month ago, C's mom asked for a specific waffle maker for her birthday, so we got it for her. We gave it to her while we were visiting just after Christmas and made the first batch of waffles on it a few days later. My in-laws were very sweet about suffering the vegan waffles, and I took a huge risk by trying a new recipe. I mean, to be fair, pretty much all the recipes are new recipes (because of the legacy of failure just described). I made this recipe. To my delight, the waffles were a hit. Crisp on the outside and moist on the inside, dense and wholesome, if more than a little heavy. Even C and I could only power through one a piece, and we can routinely eat our omni friends under the table. We had such a good experience, though, that we purchased our very own of the same iron after returning home. I repeated the experience with the same recipe and the waffles were again delicious and released easily from the pan, so no flukes so far.

Of course, I continued to click on vegan waffle recipes, though, and I found a new recipe I wanted to try. So on a Saturday afternoon, following a quick trip downtown for a haircut (for C) and a library visit (for me), I whipped up a batch for lunch. We were delighted with the results. These waffles are much lighter than the first recipe, even fluffy! The recipe creator warns against using all whole wheat if you are unaccustomed to that sort of thing, but either that was not a problem at all or my palate has shifted so much that I am not to be trusted. I made a few adjustments to the original, so I'll give you the link and detail the recipe as I made it. If you are on the hunt for a healthy vegan waffle recipe, you can stop looking. Unless you are obsessed with waffles, like I am, in which case you will never stop looking.


Healthy Vegan Whole Wheat Waffles


(Slightly adapted and modified from the brilliant Vegan Family Recipes blog.)

2 1/2 C whole wheat pastry flour
2 T baking powder
2 T unrefined cane sugar
1/2 - 1 t salt
1 1/2 C unsweetened almond milk
1 C water (warm!)
1/3 C melted unrefined coconut oil
2 T ground flax seed
2 T chia seeds
6 T cold water

In a small bowl, combine flax and chia with 6 T of cold or room-temperature water. Stir a few times to combine well and then let sit for a few minutes while you measure everything else.

In a large bowl, combine flour, baking powder, sugar, and salt. By this time, your flax and chia mixture should be pretty gelled. Add the melted coconut oil. In a separate bowl, combine milk and warm water, then add the milk mixture to the coconut oil and chia/flax. The point of all these shenanigans with the different bowls is to avoid dumping cold milk into melted coconut oil. Coconut oil wants to be solid, so keeping your wet ingredients on the warm side should prevent any unpleasantness with chunks of solid coconut oil floating in your otherwise lovely batter.

Mix the wet into the dry just until combined and set the batter aside to rest for 10 minutes. Toward the end of that 10 minutes, plug in your waffle iron. Make waffles! I don't have to tell you how to do that part, right? The above measurements made 5 crisp and fluffy waffles for me.

Thursday, July 12, 2012

Pea Soup


I’m way into summer soup. In fact, I may be more into soup as a summer thing—to be served cold and clean on a warm June evening—than as a winter comfort food. That I eat soup in the summer as opposed to the winter, when I tend to lean toward casseroles and cornbread, probably goes a long way toward explaining the bi-annual fluctuations of my pant-size. Maybe. If you don’t tend to think of soup as a warm weather food, let me persuade you of your folly. This is particularly the case since warm weather comes bearing with it bushels of fresh herbs. While I’m not usually a cheerleader for fresh herbs, finding them a bit chichi and labor intensive (especially since the implicit injunction in the foodiverse is obviously to grow your own in your dedicated mini-indoor hydroponic garden, who the hell has a yard anyway?), I’m not averse to snagging a bunch of fresh mint or thai basil at the local farmer’s market on a sunny summer morning.

With all this talk about fresh herbs, you are no doubt already peering down your nose at the recipe below, which calls not for fresh peas, washed and de-podded laboriously while listening to the Decembrists and sipping PBR, but frozen. While I am sympathetic to the romance of fresh peas, the sad fact is that life is short and the work week long. Frozen peas it is. When you throw everything together with a squeeze of fresh lemon juice and a handful of fresh mint, you will forget all about the lack of freshness in your peas.

Summer Pea Soup

2 bags frozen peas—20oz total
6 c veggie broth—c’mon intrepid cook, make your own compost broth. You have all the time in the world.
Handful fresh mint leaves
1 lemon, juiced
1 medium onion—diced, not finely—no need to knock yourself out over something you’re just going to blend up anyway
a few T olive oil

garnishes, optional: a few mint leaves and a dollop of plain non-dairy yogurt or sour cream

In a medium-large soup pot, heat the olive oil and add the onion. Saute just until translucent, then add peas and mint. Cook and stir for 1-2 minutes, then add broth. Bring to a light simmer and let it coast for 10-15 minutes. If you are lucky enough to have an immersion blender, break that bad boy out and blend the soup in the pot to the desired consistency. Some people prefer a smooth blended soup. Personally, I like mine a little on the chunky side. Texture is a highly personal thing. If you are not so lucky, blend the soup in batches. Good luck with those logistics. 


Wednesday, June 6, 2012

Shameless Addiction: Spring Rolls

I have had spring rolls on my brain recently. As I think I've noted before, for anyone who has been reading my blog consistently over its lifespan, I'm a hardcore food looper. I get really intense about a particular food for a while, and then my obsession passes. Not all loops are equal; some are much much longer than others. Por ejemplo, I have been hitting kumquats suuuuuper hard for the last three months. Every weekend, I make a trip to Rainbow Coop, the epi-center of San Francisco's natural foods community, and stock up. They are a little pricey, and I never get out of there with less than $10 worth of kumquats--about two pounds. Whole Foods can't be bothered to carry them, and it's really just as well. All things being equal, I'd rather give my money to Rainbow. With the steadily warming California weather, I've been thinking of foods that would complement my passion for those shocking little citrus fruits. I've been turning away from casseroles and baked things and toward cold things, crisp things, things that won't weigh me down--literally and figuratively. Spring rolls, which, in my opinion, are never fried--I know there are those who would disagree, maybe even entire countries (obviously, they are all wrong)--are just the thing. The supple, thin rice paper wrapper hugs a bundle of moist vermicelli, marinated tofu, and blanched snap peas. A few leaves of Thai basil add a mild, peppery depth beautifully polished off by a rich, savory peanut sauce. Heaven.

Spring Rolls

1 pkg round rice paper spring roll wrappers--I found brown rice ones!!! Hurray for technology!
1 pkg thin rice or mung bean vermicelli--these have slightly different textures, but both work just fine
1 pkg baked, marinated tofu--I like Hodosoy Beanery's Braised Tofu
1/2 lb snap peas
1 bunch thai basil

These come together really quickly. The only aspect of them that makes them a little annoying is all the prep work. Once you have that done, though, you line them up and throw them together very quickly.

First, wash the peas and peel off the tops. Take those pesky strings that run down the sides. Nothing like a snap pea string to ruin your experience of a perfectly good spring roll. Put them in a saucepan and add an inch of water. Cook on medium with a lid on just until the peas are bright green a tender-crisp. Drain and shock with cold water. Set aside.

Wash the basil and set aside.

Cut the tofu into matchsticks and set aside.

Cook the noodles. If you are super crafty, you can use the hot water that you already heated up for the peas to also cook the noodles, or vice versa. That's kind of a tall order, though.

Gather noodles, peas, tofu, and basil on the counter where you intend to assemble the rolls. Fill a large bowl with water and position it conveniently in your workspace.

Take one wrapper and put it in the water. You want the bowl to be large enough that you don't need to push on or fold the wrapper to submerge it just under the surface of the water. (Doing so will make tiny stress fractures in the delicate wrapper. Once it yields its rigidity to the soothing embrace of the water, it will emerge with huge rents and tears. Such a wrapper is good for only one thing: wrapping up bits of tofu and peas to treat your beloved who is obviously standing by, ready to wash any dish the second you are finished with it. Such a beloved would never burden a laboring chef like you with something as menial as dishes. And, take it from me, your beloved will be more grateful for that little impromptu spring roll teaser than your effort to produce it really deserves. Small favors, you know?) Let the wrapper soak for about 30 seconds or until it is soft and pliable, then remove it and put another one in. This second one will soak while you assemble your first spring roll. Lay the wrapper flat on the counter. Take 2-3 basil leaves and line them up in the center of the wrapper. Top with about 1/4-1/3 cup of vermicelli. Arrange 2 peas and 2 matchsticks of tofu on top of that and roll.

The rolling is fairly intuitive, I think. These are rolled--at least by amateurs like me--just like almost anything else (tents, sleeping bags, burritos, whatever.). Fold the sides up. They needn't meet in the center. Then, pick a side and roll as tightly as you can without tearing the wrapper. Put that spring roll to the side, remove the second paper from the water and put the third in. Continue like this until you run out of ingredients, wrappers, or (if you are a truly excellent planner) both. Serve with Peanut Sauce (below).


Peanut Sauce

1/3 c smooth peanut butter
1/3 c water
2 T Braggs
1 T rice vinegar
1 t red pepper chili flakes

In a microwave safe bowl, microwave water and peanut butter just till warmed then mix vigorously with a fork until the two have made friends. They will, I promise. Add other ingredients and adjust seasonings as desired.


Wednesday, May 23, 2012

Coconut Whipped Cream, Again

By now the blogosphere has a pretty firm handle on the different methods of creating a vegan whipped cream. Isa, genius that she is, does something involving soaked cashews, wonderful source of vegetable fat that they are. And, honestly, for all I know, her Rad Whip could beat the lunchmoney out of my version. I would bet that it could. What I have on my side is sheer simplicity.

The usual advice about coconut whipped cream is to buy the full fat cans as far in advance as you can--a few days minimum, a few weeks best practice. While this is excellent advice, I can't always swing it. A few weeks ago, I decided to finally use up all the frozen cherries I had pitted the previous summer. I ended up baking them all into cherry crisp (NB, huge mistake. never make crisp when you should be making pie). When I asked C whether he was going to want ice cream on his dessert, he said, in his most high pitched and targeted-to-persuade-me voice, "Coconut whipped creeeeaaam?" Who can say no to that? But I hadn't planned ahead, so amidst a storm of admonishments and warnings, I added coconut milk to my grocery list. At the store, I carefully selected a can and took care not to shake it, which is all pretty silly really. I've worked at a grocery store and have seen first hand the abuse to which canned goods can be subjected. At home, I put the can in the freezer for a few hours, then opened it up and got to it. On a second occasion, just a few days ago, I did the same thing. I don't really know whether the freezing period is necessary, but once you try to make coconut whipped cream from insufficiently separated coconut milk, you will take whatever steps your complete lack of planning and foresight will allow. It's entirely possible that I just got ridiculously lucky. Twice.

I did use these two opportunities to hone my manipulation of agar to maximum effect. The effect is pretty awesome, I've gotta say. I think, in hindsight, that my previous efforts were simply cowardly. I was afraid of gelatinous coconut cream. Panna cotta is one thing. F'ed up whip is another. Perhaps I was emboldened by the total flop of my aforementioned cherry crisp. I used waaay too much cornstarch and the result was...well...gelatinous. In a bad way. I ate the cherries out of it anyway, because I'm fat like that.

Anyway, to make the perfect, creamy, pillowy coconut whipped cream, at least the way I do it, you need only a handful of ingredients and about five minutes, plus chilling time. And I'm not figuring in the amount of time you might have allowed to stick your last minute coconut milk purchase in the freezer as described above. But you also don't have to beat it three times, and it only has one setting period.

Coconut Whipped Cream, version 2.0

1 can full fat coconut milk (this is not the time to buy "Lite")
1/4 c organic powdered sugar
1/2 lemon
1/4 c water
1 t (heaping) agar powder (not flakes)

Open the can of coconut milk and scoop the separated fat out into a large mixing bowl. Leave the more translucent milk in the bottom of the can and put it back in the fridge. With any luck, someone in your house will add it to smoothies or protein shakes. Otherwise, you will think wistfully of it from time to time and then eventually throw it out and feel bad. Life is full of shame. Coconut milk will not save you from it. Using an electric mixer with a whisk attachment (ok, you can do without the whisk attachment if you are unfortunate enough not to have one, but do not try to do this by hand unless you are the human equivalent of the Jetson's maid), whip the coconut until it is fluffyish (1-2 minutes). You will be beating air into the coconut so that it increases subtly in volume. Don't slouch. Add sugar and beat again. Now comes the science-y part. Squeeze the lemon into a small, microwave safe dish. Add the water, and microwave just until boiling. (Yes, microwave haters, you could undoubtedly do this on the stove. Maybe you have appropriately tiny pots and Barbie-sized saucepans that are admirably suited to the task.) Sprinkle the agar over the water and stir until dissolved. Add this mixture to the coconut and beat well. Adjust sweetness (sugar) and sourness (lemon) as desired.

Cover and chill for at least an hour. Perfect.

If you really like the people you live with, like I do, serve big dollops of it over fresh strawberries and chocolate-chip lemon scones, like I did. 


Wednesday, January 25, 2012

Guest Post: The Friendly Omni


Huzzah and greetings to Marla’s loyal readers. I’m Matt, and I am a not-proud-of-myself omni. Seriously, my ethics are just a total mess, and yet my dearest friend Marla allows me at her table and mails me amazing vegan treats on my birthday and at Christmas. She and C are wonderful, patient best friends. I repay them the best I can by scouring New York City for new delights and making sure we hit the trusty standbys (Foodswings, Champs, Pine Box). [Note from the blog owner: It's true, folks, Matt is the best non-vegan tour guide a hungry vegan in NYC could possible ask for. He diligently seeks out the awesome vegan foodiness and shleps us around the city doing what we do best: eating.]

I’m writing this because I’m undeservedly proud of myself for hosting a vegan potluck. Another dear friend, Jenny, flew into Brooklyn from the blustery coastal town of Portland, ME, to catch (reported vegan) Jeff Mangum play at BAM (Stephen Colbert was front-row, center, but it was seriously NBFD). She had 36 hours to basically see all of her Brooklyn friends, so it made the most sense to bring everyone over to my house and have a nice potluck.

It was never a question to me that it would be a vegan potluck. Most of these friends are some level of vegetarian/vegan/Thetan Level VI Vegan (see profiles below) and everyone seems to really step their shit up when it’s time to make something vegan. Check out my awesome vegan kung-fu, as it were.

It was such a good spread, and the vibes were so happy and goofy (quoth one guest: “Let’s just watch one episode of Twin Peaks and see how everyone feels.”), that I felt I had to share. So here’s the feast, and few short words from each dish’s preparer. Sorry for the shit quality of the photos. I only have a Kodak flipcam-style video camera. Small wonder the company’s bankrupt.

This is Andy. He started things off with an appetizer of killer Buffalo wings. A western New York native, he made his own seitan and deep-fried that shit, and supplied the cooling dip of his own bleu cheese dressing. It was outstanding. He blogs at Vegan Village, and you can read more about his wings there. [Note from the blog owner: Matt has done his best to foster an outright enmity between us and this handsome, charming guy by referring to him as "Super Vegan." This, of course, piques C and I's competitive edge and makes us imagine ourselves pitted against Andy in a brutal, bloody vegan-off to end all vegan-offs. Watch out, Andy.]


Andy:
“Vegan for 10 years. i made buffalo chicken wings with blu cheese dip”


Next up is Liz, who came with a wonderful and healthy rice pilaf dish.


 Liz:
“On & off vege/pescatarian for 10 years, though i just started working at a burger place and am def off that wagon for a bit! I made italian black rice pilaf with roasted shallots & fennel, golden raisins, & pinenuts.”


This is Chris, who delivered the main entrée.


Chris:
Vegetarian for a couple years. Sometimes I ignore things that have whey in them, but I'm generally dairy free. I made Moqueca de Camarão that replaced shrimp with tofu.. The tofu marinated the way you would prepare shrimp for the carnie version of the stew, but with some wakame to make it fishy ( I don't know if that attempt was successful.)


I just finished off the leftovers, and the dish was sufficiently, tastily fishy. Well-done, Chris.


Chris and Lily brought the dessert:

Chris:
“Graduated from weekday-vegetarian/freegan omnivore to a full time veggie last week. Anyway I brought vegan Granny Smith apple fritters with powdered sugar (which I think I left at your apartment).”
Lily:
“I first became a vegetarian when I was 13 or 14. I stopped for a couple years when I was 16 because I wanted to experiment and what not. I became a vegetarian again when I was 19, vegan when I was 20, back to regular ol' vegetarian when I was 26. I'm 29 now and still a vegetarian, so that's a lot of vegetables.”
Chris:
“After discussing the term with a coworker, I think I need to clarify that by calling myself a former ‘freegan-omnivore’ I didn't mean to imply I used to dine on garbage. I merely meant that if meat was offered to me for free I didn't turn it down. Now I turn it down.”
Lily:
“Garbage cans are one of the most popular sources of free meat, though. Also, i'm a Thetan-level V. i forgot to say that before. i usually don't tell people, but since you brought it up...

So, there you go. A wealth of veggie-diversity, all united to make fantastic vegan dishes. I should also note that Jenny and I made a refreshing cold cucumber/carrot salad marinated in apple cider vinegar and olive oil, but we forgot to get it out of the fridge, like a couple of dummies. In any case, it served as a nice palate-cleanser as everyone was heading out the door.

Thanks, Matt! 

Thanks for reading, and thanks to Marla for indulging me. Never has being an ally been so tasty.

Thursday, January 19, 2012

Bulgarianish Feast


I had been teasing C for months with promises of a feast inspired by, if not actually replicating, some of the yummiest food I had in Bulgaria. Being vegan in Eastern Europe turned out not to be that difficult after all, and all the language preparation I did in advance helped enormously. If I reach deep down into the core of my being, I may find that I can still ask for a non-smoking table at a restaurant in Bulgarian. I think. But, you know how it is, dear reader. If you don't use it, you lose it. At least, should I run into an errant Bulgarian, wandering through the malls and buildings of Silicon Valley, I am still armed with the words for "please" and "thank you." Aren't those the most important, anyway?

Getting back to the matter of food, though, one of the best dishes I had while traveling in Bulgaria was a stewed vegetable dish in the ski town of Bansko. It was rich and tomatoey and brilliantly simple. I ate it with a round flatbread that had been brushed with olive oil and sprinkled with paprika. Lovely. To this, I wanted to add the ubiquitous shopska salad, which made its appearance on every menu I saw. Sitting in a Bulgarian restaurant, I was a constant witness to servers making their way from the kitchen with plates that looked like nothing so much as snowy mounds of grated cheese. This, as it turns out, is shopska salad. Basically, it's a cucumber and tomato salad, sometimes with olives, topped with a white cheese of some variety. Because Daiya was in short supply (if you will grant me the understatement), I never actually got to try this dish. My curiosity, though, compelled me to take a crack at what I think it would be like.

I tossed together some diced tomatoes and cucumbers (quite a splurge in January!) and dressed the salad lightly with salt, pepper, and a bit of apple cider vinegar. Then I sprinkled the individual servings with mozzarella style Daiya. The result? It was the least impressive of the three items I made for our Bulgarian feast. It may be that I missed some key element, and I may need to appeal to people who have eaten shopska salad to advise me on this point. Or maybe the Daiya, which really is best when its warm and stretchy, just couldn't fill this particular bill.

Totally successful, however, were the vegetable stew and the armenian style flatbread. I'll include the recipe for the stew below. Stewing vegetables, as it turns out, is much more freestyle than exact. Even the recipes I found online were remarkably inexact. I decided to just gather my vegetables and go for it. For the flatbread, I specifically did not want the harder, layery pita bread. The flatbread I had and enjoyed in Bulgaria was round and soft, so I combed the internets looking for something like this. I took a gamble on a recipe for Lebanese-style flatbread and it was perfect. Also very forgiving. I threw this recipe together with hardly any kneading and let it rise twice while I ran around with C to get groceries and check out a reception site for our wedding (ieeeeeeeeee!). I also used a combination of white and whole spelt flour for health reasons and to accommodate our beloved roomie's allergy issues. Rather than grilling them, which might have been lovely had I the time or inclination, I baked them in a 450 oven for about 7 minutes per side. The resulting breads were toothsome and tender, just what I wanted. We at them with a bit of earth balance and a generous sprinkling of some of the paprika I brought back from Bulgaria.

Monastery Stew (Vegetable Hotch Potch. Whatever)

3 medium russet potatoes, diced
2 heads broccoli, chopped
3 carrots, sliced
1/2 pound white mushrooms, quartered
1/2 pound green beans, cut
1 large yellow onion, sliced
1 28 oz can crushed tomatoes
garlic
2 cubes vegetable broth

Preheat oven to 450. In a large dutch oven, saute the onion in a bit of olive oil. When it starts to become translucent, add the carrots. I just kept cutting the vegetables and adding them to the pot as I finished them. Do the mushrooms last. Then pour the tomatoes over the whole thing. Add about an additional cup of water, and the two broth cubes. Cover the pot and slide it into the oven. Bake 30-34 minutes, or until the vegetables are soft. Check the stew every 10 minutes or so, stirring to let the flavors mingle.
C and D both said that this tasted very rich. And it's so so simple.

Monday, December 26, 2011

Holiday Indulgences

We're fairly low key holiday people, for various reasons. Adulthood brings with it multiple changes, adjustments, and occasional disappointments, and it's up to us to negotiate this time of year that is both the brightest (for some) and the loneliest (for many). C and I both come from families where the holidays--Thanksgiving and Christmas, especially, are pretty much a BFD. My mother always went to great lengths to make these days special, introducing lots of tiny rituals and letting me (even as a kid) be responsible for planning and making things that everyone would eat. I think, but I'm not sure, that at least some of these early efforts included things like vienna sausages and cheeze whiz. Cuz, you know, I was a kid. Even when I got older--high school and undergraduate college--my mom insisted on reading aloud from Twas the Night Before Christmas. Though I don't follow most of these traditions as an adult with my own household, sort of--it's the economy, yo--she did successfully instill in me an appreciation for tradition and a certain amount of modified ceremony. As a result, I can get a bit persnickety about making things special around the holidays. Mostly, because C and I are such vigorously confirmed fatty pantses, this means special things to eat.


C has some similar holiday issues. I wouldn't call it baggage, exactly, but even after a few years of not spending the holidays with his family, he continuously regales me with tales of his mom's fabulous Christmas traditions. And I've gotta say, that shit does sound good. But again, what he have together is mostly food. For Christmas breakfast this year, I made the much-lauded cinnamon rolls. I've blogged about them before, but I usually make a slight modification of Isa's recipe from Vegan Brunch. I've posted the recipe before, so you could either flip back through the recipes (a feat made much easier by the new blog format), or just buy her book. She's awesome and she lives in Omaha. That is easily one of my favorite cookbooks. And the cinnamon roll recipe is both minimally fussy, very flexible, and consistently awesome. I used half white spelt flour and half whole wheat pastry flour. Our beloved roomie has issues with wheat, so we do our best to accommodate her gastronomical requirements. I also added orange zest to the dough and chocolate chips to the filling, which took these rolls a tick over the limit of what is truly reasonable. Isn't that what the holidays are really about? Violating the bounds of decency through rampant consumption? We're just doing our part. We also had tempeh bacon (by C) and a beet and citrus salad (by D).

After a day of lounging about, reading and chattering at each other, we had a festive dinner. D was up north, so C and I had to content ourselves with one another's company. Not particularly difficult since we like each other. When you have all day to cook something and aren't in any kind of hurry, definitely try this seitan brisket from the seemingly (and sadly) defunct Veganize It...Don't Criticize It! (Who am I to be talking about defunct, though, amiright?) We ate this moist, flavorful brisket heaped with red wine reduction gravy and stewed vegetables. On the side, we had some perfectly cooked brussels sprouts and these pull-apart pumpkin rolls. The rolls were good but not as fluffy and moist as one might hope. This, however, was entirely my fault for using a whole grain flour. After the near-diabetes-inducing cinnamon rolls from the morning, C and I wanted to give our systems a little break. They were still tasty and soaked up the juice from the brisket with great panache.

Happy holidays, everyone! Or, alternatively, happy holidays are over! 

Friday, December 2, 2011

Guest Post: No-tella Cookies!


I am become an inveterate shirker, but here to save the day is another guest post from my vivacious and clever sister on the other side of the country! If you have been keenly feeling the lack of nutella in your life, because your ethics/health concerns have driven you away from the miasma of animal products, make sure to give these a go. You won't be disappointed: 

My youngest daughter set out this fall to complete a NOLS course out west, we live in Florida.  With a very heavy, mommy-heart, I sent her off and knew I might only speak to her at the completion of her term.  (If you don't know NOLS, I highly suggest having a look into it for any newly graduated in your life.  The term has been amazing for her as a human and also as a young woman, but you haven't tuned in to to hear my lustful mommy lamentations!  Please feel free to contact me at any time for those.)  When she called, shortly after arriving, to tell me she would be able to not only make calls, but also receive mail between courses, I nearly leapt for joy, repeatedly! 

Being a huge lover of mail, the UPS Truck, and all sorts of things having to do with correspondence, having the opportunity to reach out to her in that way was delightful.  I wanted to pack her a box of things that she could use, enjoy, but that would not be burdensome to her.  Amongst her group they live by the motto:  Ounces equal pounds, and pounds equal pain.  So, what woud be more obvious to a mother and daughther who have shared much connectivity over coffees, cupccakes, cookies, pies, cakes than a box of mommy-baked-lovin? 

Considering all of the above I landed on cookies, being that they are such heartly little travelers and so easy to share.  Everyone loves cookies!  My daughter is a cookie lover from way back and a Nutella junkie.  I began to draft a plan to create some peanut butter cookies made with Nutella, except not Nutella, because it isn't vegan.  Aftert much recipe reading and thinking and stewing (yes, I am my sister's sister, and that shit runs deep) my No-Tella Cookies were made.  I call them mine because I have made the recipe pulling from about eight separate takes on vegan peanut butter cookie recipes, and a few non-vegan recipes.  In the end, it didn't prove to be too difficult and I maintain that successfull baking is all about ratios, sweetness, and consistency of the batter/dough.  Call it cups, handfulls, coffee mug-fulls, or in my case, small pottery bowls made by my grandmother (I don't own measuring cups or measuring spoons, *gasp*).  So, if you are implementing my recipe, please feel free to make changes, swap ingredients for others of likeness in wetness or quality, it'll probably be okay!

In any case, my point here is to share what I planned, what I did, and how it all went down.  Please, enjoy!!!!!

Vegan No-Tella Cookies:

First, make No-Tella

In a double boiler combine:
 1 standard jar almond butter (hazelnut, peanut, whatever.)
2 standard bags semi-sweet chocolate chips
1t vanilla
1 cup confectioner's sugar

The cookies
2 c flour
1t baking soda
3/4t salt
1 c No-Tella
1 c maple syrup
1 1/2 t vanilla
apple sauce

Mix all wet ingredients (while the No-Tella is still warm from the stove is very helpful!)
Mix all dry ingredients
Add dry to wet in increments mixing well.
When all is combined, the dough will be a bit dry and will become slightly drier the longer you have it on the countertop, for this purpose, have some applesauce handy and add as needed.  Your cookie dough is the best consistency when it does not stick to your hands when balling it and yet is not so crumbly that balling it is impossible.  Don't be afraid of adding applesauce as it seems necessary!

I baked at 350 until they were cooked, but I have recently read about baking cookies at lower temperatures to bake more evenly without over-cooking the cookie edeges and would do that with this recipe next time I make them.  These cookies are a bit of the heftier variety and as such, a slower, more soaking baking environment may be beneficial. 

The end of the story is that my daughter loved her No-Tella cookies!  They were also loved by my other two girls who received mommy-packages, my husband, my youngest son (he sits very firmly in the pastry camp with me), and the local rowing team.  I hope that you enjoy them and love them. 

 [NB: She also sent them to your favorite absentee blogger, who also loved them!]

Tuesday, November 1, 2011

October Sweets

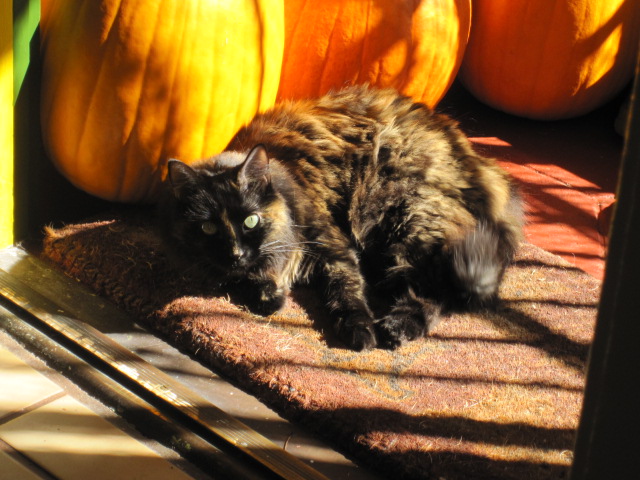
Who doesn't love kitties, pumpkins, and sunshine?
I've planned a number of things to blog about recently, but not all of them have worked out as well as I hoped. The first one was a pizza-themed stuffed squash, which I thought would be fantastic and ended up not. My brainstorm/flash-of-brilliance/genius moment was the idea to create a kind of deep-dish pizza experience inside the organic buttercup squash C and I bought on a recent trip to the quaint and country-ish north bay. Note, I can call the north bay quaint and country-ish with that bland, self-satisfied air that city people use to talk about rural areas now that we have relocated to the city from that same quaint and country-ish area. Have I mentioned how much living in San Francisco is rocking my socks? Cuz it is. In any case, the squashes looked wonderful, particularly since we acquired them on a honeyed afternoon, strolling around rustic pumpkin patches in the deliciously fall-tastic California sunshine. I should add that C (as part of a bargain the details of which I will refrain from boring you) paid dearly for the pleasure of bringing home a selection of gourds and squashes from that visit. They were ~quite~ pricey, but, again, the price reflected the beauty of the whole experience. This is especially easy for me to say as, again, I was not the one paying.

So, anyway, I hollowed out these squashes and stuffed them with layers of sauteed sausage, greens, onions, tomatoes, and cheese. Then I baked them for....well....too long, as it turns out. Or maybe my error was in not adding enough moisture to the fillings before I baked them. Or maybe they needed to be covered with foil. In any case, though they were entirely edible, they were also a long way from wonderful. You will not get that recipe from me.


Instead, I want to tell you about two successes. Kind of. First, in preparation for Halloween, and after realizing that it had been a long long time since I had done any baking at all, I decided to try Isa's new recipe for traditional chocolate pudding pie. I think I've already spent some time ranting about how annoying I find the tofu + chocolate chip concoction when it is made to stand in for all things thick and chocolatey. It serves quite nicely as cupcake topping or as a dense dessert, but please don't put it in a pie shell and try to sell it to me as pudding (or as whipped cream, because,  COME ON!). Instead, when the craving for pudding strikes, and if you're anything like me, it does strike, resist the urge to buy something pre-made and back away from the tofu and chocolate chips. Back far, far away. Make this instead: Old Fashioned Chocolate Pudding Pie. Isa Chandra is a goddess. Everyone should know it.The white blobs on my pie represent my effort to transform this already perfect missive of chocolately goodness into a s'mores pie. I mistakenly thought that melting vegan marshmallows might produce something vaguely drizzle-able if not spreadable. As it turns out, not so much. Might I suggest simply dotting the top of your pudding with whole or chopped marshmallows (or better yet, ricemallow cream) should you share a similar mania for improving upon perfection? Don't do what I did. That way lies madness. And failure. Delicious, delicious failure.

Yesterday was Halloween, and we decided to mark the occasion with some special, Halloweeny candy. After mulling over our options--D wanted butterfingers, C wanted peanut butter cups, I wanted to melt some freaking chocolate over something or another--we opted for creative candy cups. These were super super simple and extravagantly rich. You know, like candy. I'm including the "recipe" here with the understanding that if you google "vegan peanut butter cups," the internet will produce a plethora of identical or nearly identical versions of the same thing. The basic idea is that you melt chocolate chips, spread the melted chocolate into cups, fill with whatever, then top with more chocolate. I'll be more specific for those of you who might feel a little trepidatious about this process and include the sincere assurance that you need fear no peanut butter cup. But also make sure that you have people over to help you eat these. Take my word for it. Anyway, here's how I made them:

1 1/2 bags vegan chocolate chips (I used WF brand)


Line a cupcake pan with standard liners. Put 3/4 of the chips in a microwave safe bowl. Microwave on high for 30 second intervals, stirring well between each one. When the chips are smooth and completely melted, spoon evenly into 12 cupcake liners. Use the back of a spoon or a pastry brush (I did a combination of both and found this process quite messy indeed) to spread the chocolate up the sides of the cupcake liners. Put the pan in the freezer while you make the peanut butter filling.

1 cup chunky peanut butter
1/4 c powdered sugar
1 t salt

Stir well. Remove pan from freezer. If the chocolate is nice and solid, drop spoonfuls of the peanut butter mixture into the bottom of the shells. Distribute evenly and press down to cover the bottoms of the shells. We decided to get crazy and top the peanut butter mixture with either crushed pretzel bits or a single frozen cherry. (The cherry was my own genius addition to the chocolate peanut butter cup phenomenon. Remember, you heard it here first.) Press everything firmly down. Put the pan back in the freezer while you prepare more melted chocolate.

Microwave the remaining chips in the same way. When the chocolate is ready, spoon over the peanut/pretzel/cherry topping. Smooth out as much as you can. Don't worry if the chocolate doesn't completely cover the top. They're homemade. Chill out. Sprinkle with course sea salt and refrigerate.

Try not to get diabetes.

Wednesday, October 19, 2011

Yuca Chips

My sincere apologies in advance to those of you unfortunate souls living in the large swaths of the world where this delectable root is unavailable. As a longtime erstwhile dweller in such places, I have many times been frustrated by a lack of access to certain products and items that didn't make it to the shelves of my local grocery story or natural foods cooperative. Now that I live in San Francisco, and it is absolutely everything you imagine it to be, dear reader-living-elsewhere, I suffer from no such condition of scarcity. This ubiquitous abundance has lulled me into a false, but not totally unwarranted, sense of security. You might also call it a certain grocery-related cockiness. It went like this: After thinking about yuca off and on for the last year or so, I finally decided to make some chips as a delicious, greasy accompaniment to nice, salty savory black bean soup--Cuban style. Well, I'm not totally sure it isn't actually Colombian style because every component of this dish is traceable to the influence of my friend tatiana de la tierra. When we all lived in Buffalo, and C and I were super lucky and well-behaved, tati would have us over for dinner. One my favorite things that she made was an intensely garlicky black bean soup, greens, and yuca. Mostly, she would boil the yuca, insisting that the important step was to "shock" the frozen chunks of root by quickly immersing them in boiling water. She would then dress the cooked chunks very simply with  bit of olive oil and vinegar (I think). While I haven't tried boiling it in this way, I did try my hand at frying it into thinly sliced chips. I like that so much that I haven't branched out far beyond it. Perhaps this is a mistake and my kind readers will show me the error of my ways.

On this specific occasion, perhaps because I have walked by the piles of yuca so frequently in the grocery store, blithely certain that it would be there when I wanted it, I had a hard time finding it. I actually had to go to no fewer than four stores before I located it (for 99 cents a pound!) at a little grocery store on Folsom. The moral of the story? Stay humble.  Learn from my mistake, dear reader.


But perhaps I should back up just a bit. Dear readers, meet yuca-->. Yuca, readers. (image lifted from this lovely website). My understanding is that this white root is one and the same with cassava, which we hear so much more about. My friends in Montana are always a bit confused--as I was once--about the difference between this plant and the more familiar (in drier states) yucca (on left). Don't confuse the two. One has leaves like razor wire and no edible root to speak of, the other is deliciousness incarnate.

When I first had yuca, the best way I could think of to describe it is like a potato if potatoes were super-powered and extra delicious. Yuca has all the tenderness and durability of a potato without the cloying starchiness. It truly is wondrous. If you are lucky enough to live where you can find this root, and you haven't already tried it, may I heartily recommend that you do so? As a bonus, if you prepare like I describe below, it's super fast and easy.

Yuca Chips--this barely qualifies as a recipe, I realize

yuca--Have at least two roots to make it worth your while. Trust me, you're not likely to have leftovers!
oil for frying--I used canola, but you could use any oil that performs well at high heat
salt
1 lemon

I know, right? I feel a little silly. Peel the yuca. It will have thick, waxy skin, but it comes away easily enough with a sharp paring knife. Cut off the extra hard stem at one end and remove any dark or unappealing bits. Do I really have to tell you that? Now use your excellent knife skills to slice the yuca width-wise into thin chip-sized pieces. Fry in hot oil until golden and just a little crispy. Sprinkle with salt and squeeze the lemon over the chips. Delicious. Potatoes can go to hell.

Incidentally, I wasn't planning on blogging at this time about the Cuban/Colombian style black bean soup, but let me know if that's something you would like to see. I live to serve you.

Sunday, October 9, 2011

Desperation Lasagna

Doesn't "desperation lasagna" sound like something you might eat with Calamity Jane? The two of you could slam forkfuls of the stuff into your starvling mouths and wash it down with brimming tumblers of sour mash. Don't forget to swear. A LOT. I'm not sure why, but this morning I have a bit of Deadwood on the brain. If you haven't seen that regrettably short-lived show, I assure you that you are missing out. After watching a single season, you will doubtless notice a marked uptick in your use of the f-bomb, and you might even find yourself unconsciously mimicking Tim Olyphant's signature loose-and-stiff-at-the-same-time saunter. That's how you walk when you're not afraid of anybody or anything. And, really, couldn't we all use a little less fear? My goal for the day is to channel Olyphant. Not a bad objective, as such things go.
    
But I didn't name this dish Desperation Lasagna specifically thinking about the Old West, except for the fact that my work schedule has me running around so much that a patient observer might have been treated to the sight of tumbleweeds blowing through the virtual landscape of my much-neglected blog. Never fear, dear readers. Though I have taken other mistresses, writing for other sites, you are still my first love. But I digress. Desperation lasagna is actually sort of a euphemistic name. I also could have called it "kitchen sink lasagna," since I made free with the ingredients based on what we had around. For example, we didn't have mozzarella daiya, which is what I would normally use for lasagna, but we did have cheddar. Thinking about yellow and lasagna led me to sub other ingredients for those of a similar hue. Thus, I discovered that butternut squash and corn are actually quite delightful in a cheddary dish of lasagna in place of sausage and mushrooms. And why not? I already put all kinds of unconventional things in my enchiladas. Lasagna is the next logical step. I think if C could testify, he would tell you that it was quite delicious.

Finally, a note about the noodles. I don't precook lasagna noodles. Ever. In my view, it's a total waste of time and energy. And the no-boil lasagna noodles are a rip-off. Don't bother with them. Regular noodles work just fine without pre-boilng, so save your money for some beer and chocolate. That's what I do.


Desperation Lasagna

1 pkg lasagna noodles--I used brown rice because our new roomie has wheat issues, and I thought she might want some eventually, but any kind is fine. Just keep the quinoa away from me. It hates me.
1 28 oz can crushed tomatoes
1 pkg cheddar Daiya or Follow Your Heart cheese (Or go traditional and use mozzarella. See if I care. Or be totally crazy and skip the cheese altogether. You won't miss it that much.)

Ricotta -- Should I be calling this something clever, like "RiNotta"? Oh well.
2 pkgs tofu (28 oz total), extra firm
1/4 c nutritional yeast
1 T, heaping, dried basil
1/8 c olive oil
4-5 minced garlic cloves

Mash everything together in a big bowl, and set aside while you prepare your veggie filling.

Veggie Filling
2 T olive oil
1 pkg frozen butternut squash. (Normally, I would use fresh, but it's still pretty spendy in these parts--not quite yet in season--and I was [as usual] short on time. Sue me.)
1 c frozen corn kernels
1 large onion, thinly sliced
3-4 minced garlic cloves
1 head curly kale, chopped
Thyme and marjoram to taste
A few splashes of Bragg's

Saute onion in oil with garlic until translucent. Add squash and herbs and cook 2-3 minutes. Stir in kale and corn, add some Braggs, and cook until kale is softish and dark green. It can finish cooking in the oven.

Assemblage

Lightly oil a casserole dish.  Open the can of tomatoes and spoon about 1/4 of them directly into the pan. Spread around to cover the bottom in a thin layer. Layer half the noodles on top. Don't worry if they need to overlap a bit. It doesn't matter, and what are you going to do with leftover lasagna noodles? Nothing. So don't waste them. Spoon 1/2 of the tofu mixture on top of the noodles, then cover that with half the veggies. Add 1/2 cup of water to the can of tomatoes and stir, then spoon 1/2 of that mixture onto the veggies. Sprinkle with 1/2 your cheese. Repeat with the second layer: Noodles, ricotta, veggies, tomatoes, cheese. Cover the pan with aluminum foil. This is an important step as it traps the moisture for the noodles to absorb instead of releasing it into the oven. Cook 1 hour and 20 minutes. Let stand 10 minutes before serving.

Wednesday, September 7, 2011

Distracted Mac n Cheez

As I mentioned briefly at the end of my last post (and I know that you are hanging, trembling, from my every word, dearest reader), I've recently landed a new job. I love the work, but the commute has thrown my cooking (and reading and running and writing and everything else) schedule into a bit of a tailspin. As I struggle to regain my equilibrium and accustom myself to my new work schedule, I hope you will hang with me as my posts slow down a bit. Not only have I not had as much time to write of late, but I also haven't had as much time and energy to cook meals worthy of blogging about. Experimental cooking and baking require a certain amount of space and time to percolate, to develop, to be born into the world. In other words, to be a food blogger or a novelist, as a famous lady once said, requires a living wage and a room of one's own. I'm only making part of that up. And before I have you thinking that my situation is one of utter scarcity, I should mention that I recently made a really slamming lentil soup with whole wheat biscuits, but neglected to photocopy it before it was all gone--or, really, disappeared down C's voracious and extremely charming gullet. I've already threatened to make it again and blog about it, this time making sure to capture the necessary photographs. One can't blog about a new recipe without also posting pics, can one? Is this yet another instance of an area in my life where I am imposing artificial and unnecessary restrictions? I'm awesome at that.


For today, though, I have something a bit different. As I mentioned, C and I are living a bit in extremis right now. I'm swamped with work and driving, but so is he. In addition to all the usual nervous-making business, he's sickish. This magical combination of circumstances led to him slumping over his laptop all day, mostly suffering silently through lesson plans and job letters. When we got around to discussing what to have for dinner, as we do especially when I'm uninspired, C murmured--somewhat incoherently--about how much his sicky stomach wanted macaroni and cheese. As I've mentioned before, we aren't usually pasta people, but we are human; we can get down with some mac n cheese from time to time. Also, I've posted mac n cheese recipes before, most notably my sister's recipe, but the one I made tonight is a little simpler and a lot lazier. This one isn't bad for an evening when you're short on time and ingredients but long on the desire for comfort food.

Distracted Mac n Cheez

1 pkg (9oz)  whole wheat pasta (I used fusilli--personal preference)
4 T earth balance
1/2 c garbanzo bean flour
1 T dried mustard powder
2 c non-dairy milk (I used unsweetened almond)
1 T marjoram
1 T whole black peppercorns
2 t salt
1 block Follow Your Heart cheddar vegan cheese--grated
1 pkg vegan lunch meat, chopped--I used turkey style
1 1/2 c frozen peas

Preheat oven to 350. Bring a large pot of water to a boil and add pasta. Set a timer for 12 minutes, so you don't need to worry about keeping track of time. When the 12 minutes are up and your pasta is delightfully al dente, remove from heat and drain well. Set aside. While the pasta is cooking, make your cheezy sauce. In a medium saucepan, melt margarine. Add garbanzo bean flour and cook 2-3 minutes over medium heat until fragrant and bubbly. Add mustard powder and stir well. Slowly stir in non-dairy milk and bring to a simmer. Add peppercorns, salt, and marjoram, then cook until thick and bubbly. Remove from heat and stir in lunch meat and peas.


Lightly oil a large casserole dish. Add pasta. Grate half of cheese over pasta, add all of sauce, and stir to combine. Top with remaining cheese. Cover the dish with aluminum foil and bake for 30 minutes. Let stand 10 minutes before serving. If this was Cafe Gratitude, I would make you utter the following affirmation before I let you eat it: I Am Comforted.

Saturday, August 20, 2011

Vegan Buffalo


Legendary Biff's Sandwic
C and I just got back from a week-long trip to visit our BFFs in New York. As always, when we travel, we cut a vicious swath through every vegan food establishment that crosses our paths--and some that don't. While in NYC, of course, we hit our much beloved Foodswings on a few occasions, though we also found time for a few other places. With the exception of one ill-fated night spent at a Hilton in downtown Manhattan, drinking martinis and drunkenly arguing politics with a financial manager named Raoul, I ate really really well. On that latter occasion, I spent the day cavorting--as much as I can ever be accurately described as cavorting--with my lovely sister around Manhattan, and by the time we got around to trying to locate some vegan food in the financial district, we were up to our eyeballs in vodka and oriental snack mix. In any case, while I might tell you a bit more about our fooding adventures in NYC, for now I want to focus on a much-maligned city in the heart of America's Rust Belt (and my former home)--Buffalo.

What you should order for breakfast.
Veggie Wetshoes
I realize that you, dear reader, might not readily imagine Buffalo to be a vibrant locus of delectable, affordable, and easily accessible vegan victuals, and I can totally see how you might feel that way. Nevertheless, stuff has seriously improved in that unassuming and friendly burg. Our favorite place always has been and continues to be Amy's Place. I'd love to give you a link to a page that would capture the bohemian charm of the place, but they are so authentically bohemian that no such page exists. Instead, you just have to go there, order yourself a plate of veggie wetshoes (hold the cheese and sour cream), and say hi to Amanda for me (Hey, Amanda!). They have gotten more vegan friendly over the last few years, culminating (at least according to C and I, but who else would you listen to on this topic?) with the Biff's Sandwich. This barbecued seitan masterpiece is served with thinly sliced onions and tomatoes on a sesame roll with non-dairy garlic spread. I'm drooling a little just thinking about it. C and I always order it with steamed broccoli to replace the usually scattering of potato chips and compensate for the lack of grease and fat (in the chips, anyway) with an order of veggie wetshoes. These are curly fries topped with Amy's signature lentils. If you want to go really crazy you can ask them to add veggies or more seitan to the order. But that's only if you're really really really nuts. In the morning, we get more of the lentils served with veggies, homefries, and toast, along with a side of tofu bacon, which they call sizzle strips. I can't stop them from calling them that.

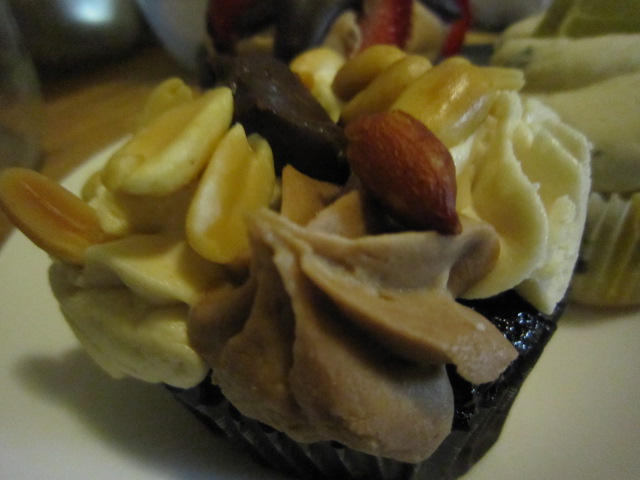
Finally, though I'll admit to being a little over vegan cupcakes (done and done, people!), the locally owned bakery Dolci makes some fan-freaking-tastic cupcakes. They also had brownies and cookies, which I'm sure are good also, but if you check out the pics of the chocolate peanut butter, chocolate strawberry, and rum-soaked mojito cupcakes, I think you'll see why I chose the way I did. These were all moist, sweet, and flavorful, but not the kinds of sweets one should eat lightly. Half of a chocolate peanut butter cupcake cracked me out, but maybe I'm overly sensitive. In any case, these are thoughtfully made and totally delicious. The chocolate peanut butter is a chocolate cupcake filled with a dense, sweetened peanut butter filling and topped with smooth peanut buttery buttercream and more chocolate. The chocolate strawberry is the same cupcake with smooth, chocolatey filling and strawberry buttercream (and fresh strawberry slices! ftw!). Finally, the mojito is a lime flavored, rum-soaked cupcake topped with a slightly salty lime frosting. There was nothing underwhelming about any of them. Quite impressive. And if the cupcakes aren't reason enough to travel to Buffalo just to stuff them into your face, let me assure you that the service is top-notch. When I went, my good friend Shawnie was working, and he is beyond adorable and totally sweet. If you require more incentive than that, I simply can't help you.


As a side note, I hope to get some more cooking posts up soon. I got a job I really like and am still getting used to the schedule. Bear with me through the transition!